






- Navigation -
 Current Location:
NEWS DETAILS
NEWS INFORMATION
Cast Iron 3D Welding Table with Fixtures: A Modular Tooling Guide
AUTHOR:Bozhong Tool DATE:2026-10-07 11:07:19 HITS:154
A cast iron 3D welding table with fixtures is not simply a flat surface with holes in it. It is an integrated tooling system: a dimensionally stable base, a grid of precision holes on every working face, and a family of clamps, stops, angle plates and locating elements that turn the grid into a purpose-built jig in minutes. Shops that adopt it usually do so for one reason — the ability to fixture complex, non-rectangular assemblies without building a dedicated jig for each one.
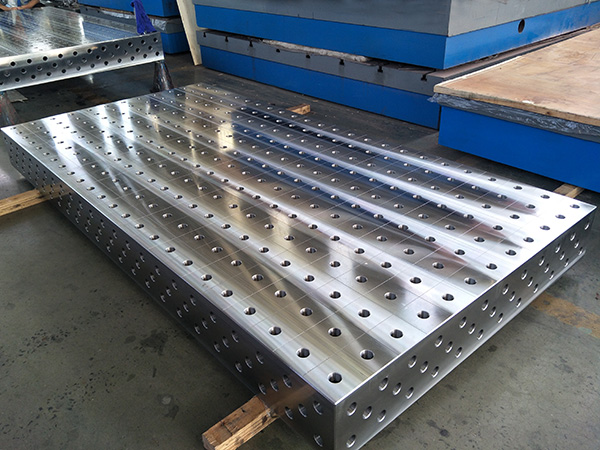
This guide explains why cast iron is chosen as the base material, how the three-dimensional aspect of the system is used in practice, which fixture elements deliver the fastest payback, and how to plan and maintain layouts so the system stays accurate.
1. Why Cast Iron for a 3D Welding Table?
Steel and cast iron both make excellent welding platforms, but they behave differently. Cast iron is selected where dimensional stability under thermal cycling and resistance to vibration matter more than raw impact toughness.
Damping capacity: cast iron absorbs vibration far better than steel, which keeps clamped setups from 'ringing' and helps hold position during welding and light machining.
Thermal stability: the material responds slowly and predictably to temperature change, so the working surface moves less during a long welding cycle.
Wear behaviour: a cast iron surface holds a scraped or ground finish well and releases weld spatter more readily than a rougher surface.
Reconditionability: a worn cast iron surface can be re-scraped or re-machined and brought back to grade, extending service life well beyond that of a disposable top.
2. What Makes It '3D'
In a two-dimensional system, work is clamped to a single horizontal plane. In a 3D flexible welding platform, the hole grid continues on vertical faces and on add-on angle and riser elements, so fixturing can be built upward as well as outward. That is what makes boxed frames, towers, enclosures and pipe assemblies practical to fixture without custom jigs.
In practice, the third dimension is delivered by a small set of elements:
Vertical angle plates and cube elements that bolt to the grid and present a new working plane.
Riser and support blocks that lift the workpiece clear of the surface for access to underside welds.
Right-angle brackets and square elements that guarantee 90° without measuring.
Extendable arms and holders for locating datum faces above the table.
3. The Fixture Elements to Buy First
The temptation is to buy a large kit. The better approach is to buy the elements used on most jobs, in multiples, and add specialised parts as specific jobs demand them. A proven first purchase:
| Element | Suggested quantity per station | Why it earns its place |
|---|---|---|
| Quick-locking clamps | 6–8 | The single largest reduction in setup time |
| Locating stops / stop rails | 8–12 | Define datums; used on nearly every job |
| Angle brackets / right-angle plates | 4 | Guarantee square corners without layout |
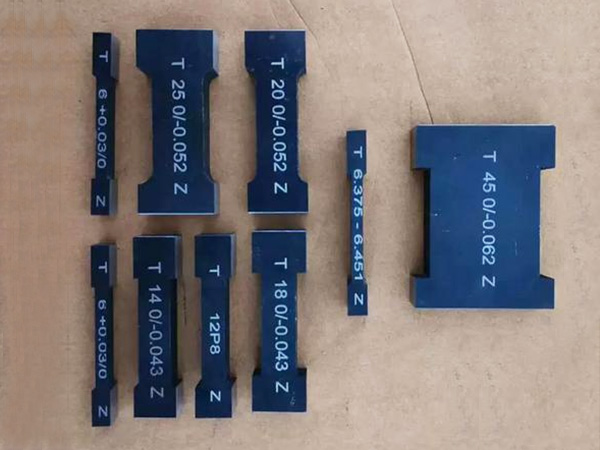
| Locating pins and bushings | 20–30 (consumable) | Wear items; stock spares to avoid downtime |
| Support and riser blocks | 6–10 | Access to underside welds and odd shapes |
| Hole plugs and cleaning brushes | 1 set | Cheap protection that preserves accuracy |
4. Planning a Layout That Welds Correctly the First Time
A fixture layout is an engineering decision, not a clamping exercise. Work in this order:
Choose datums first. Pick the faces that the finished assembly must relate to, and locate from those — not from whatever edge is convenient.
Locate, then clamp. Position the part against stops with light hand pressure, verify, then apply holding force.
Anticipate distortion. Place restraints where the weld will pull, and consider a pre-set counter-bend for long, single-sided welds.
Keep heat away from the fixture. Use sacrificial tabs and copper backing where possible so clamps and bushings are not in the heat-affected zone.
Record the setup. Photograph the layout and note the hole coordinates; the second and twentieth repeat then take minutes.
5. Typical Applications
Frames and base structures where squareness and hole positions must repeat across batches.
Machine guards, enclosures and cabinets where panels must align on assembly.
Pipe and tube assemblies that need repeatable angle and flange orientation.
Prototype and one-off fabrications where a dedicated jig would cost more than the part.
Repair and rework stations where the geometry of the incoming part is never quite the same twice.
6. Keeping the System Accurate
Modular tooling degrades through small, cumulative damage. A short discipline prevents nearly all of it:
Clean holes and surface at the end of each shift; spatter in a hole is the number one cause of clamps that will not seat.
Dress burrs around hole edges immediately, before they change how a bushing fits.
Replace worn pins and bushings on a schedule rather than when they fail.
Verify flatness periodically and after any significant impact or overload event.
Store fixture elements on a rack, not on the working surface.
FAQ: Cast Iron 3D Welding Tables
Is cast iron too brittle for a welding shop?
Under normal fixturing loads, no. Cast iron is used because it is stiff and dimensionally stable. The failure mode to avoid is impact: dropping heavy sections onto the surface or striking it with a hammer can chip edges. Use sacrificial plates for any destructive work.
Can I add fixtures later?
Yes, and that is the design intent. Because hole diameter, grid pitch and clamping interfaces are standardised, elements bought later fit the same table. Confirm the system specification when you buy, so that future additions match.
Do I need on-site installation?
For single tables, a competent maintenance team can level and install them. For spliced platforms and large installations, professional installation — including levelling, scraping and lapping — is the difference between a surface that meets grade and one that merely looks flat.
Botou Bozhong Precision Machine Tool Co., Ltd. has produced cast iron welding platforms, T-slot plates, granite measuring tools and machine tool castings since 1976, with an in-house team for on-site debugging, installation, maintenance, scraping and lapping. Assembly drawings, batch quantities and tolerance targets are enough for our engineers to propose a fixture kit and a layout.
-
Cast Iron 3D Welding Table with Fixtures: A Modular Tooling Guide
-
D16 vs D28 Steel Welding Table: How to Choose the Right Hole System
-
D16 Welding Table Hole System: A Complete Buyer's Guide for Fabrication Shops
-
Welding Table Surface Hardness — What Rockwell and Brinell Numbers Mean for Buyers
-
Welding Table Load Capacity — Understanding Static and Dynamic Ratings
-
Modular Welding Table ROI — Calculating Return on Investment for Fabrication Shops
Botou Bozhong Precision Machine Tool Co., Ltd.
Copyright © 2025-2026 https://www.bozhong-weldingtable.com. All Rights Reserved Botou Bozhong Precision Machine Tool Co., Ltd.Copyright